Keeping A Quality Field Depends On You!
These are some general guidelines for coaches to follow when preparing fields before games and maintaining them after games.
If the fields are not maintained daily after use, they will be in bad shape by seasons midpoint. Help yourself by recruiting parents to help you and your assistant coaches. If you have enough help it should only take 10 minutes to clean up the field.
If you have any questions on the field conditions or maintenance of the fields please contact Joe Galbraith the Facilities & Safety Manger. Safety@Nellsb.org
Field Safety
Because all it takes is one small piece of debris to injure a player, coaches need to inspect the playing field before any game starts. This responsibility is too important to leave to the opposing coach or the grounds crews. All the players are your responsibility, and you need to take every step you can to ensure their safety. Be sure to look around for any item or piece of debris that poses a safety hazard, including the following:
- Rocks
- Broken glass
- Loose sod
- Pieces of metal
- Holes, both in the field and foul territory.
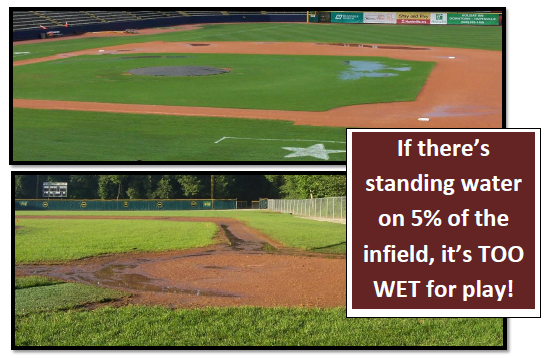
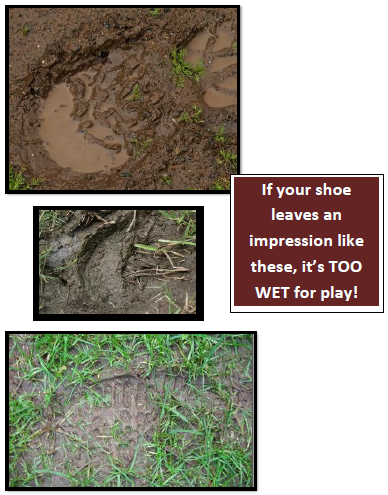
Determining Field Playability
The decision to play on fields that are too wet is the number one cause of damage to ball fields and the top reason for player injury. And often, techniques used to make a wet field “playable” cause additional damage. Making the tough call to postpone a game due to wet conditions is the best decision for player safety and to preserve season-long playability of the ball fields.
Water Removal Techniques
The most important mistake to avoid is the removal or movement of infield mix. A level field will drain better and have fewer puddles. Low spots or depressions catch and hold water EVERY TIME!
DO NOT Use These Methods on Wet Fields!
- DO NOT use brooms or rakes to disperse puddles.
- DO NOT sweep a puddle into the grass.
- DO NOT remove muddy infield mix from the field.
For Small Or Shallow Puddles, Use Water Absorbent Foam Pads.
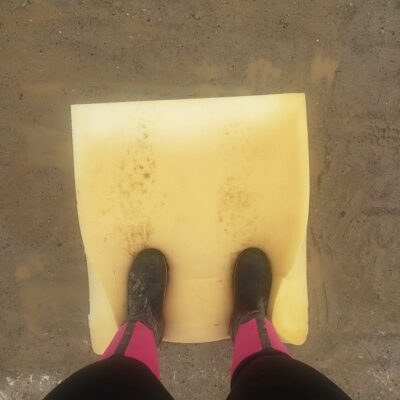
- We keep foam squares in the maintenance shed for cleaning up small puddles on the field. There are several in there so feel free to recruit players or parents to help.
- Allow the foam square to soak up the water.
- Have a bucket nearby to wring out the saturated foam
- Empty the bucket of water off the field of play. Do not dump in the extracted water in the outfield or gravel areas.
- Once completed, ring out the foams and replace them in the shed. Do not put soaked foams in the shed it will ruin the wood.
- After the standing water has been removed, use a rake or nail drag to loosen the infield mix so it will dry more quickly.
- Conduct pre-game drills in another area while you allow some time for the infield to air dry.
Addition Of Field Drying Agents
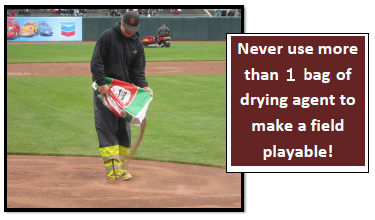
Calcined and vitrified clay marketed under the brand names Turface, Pro’s Choice, Diamond Pro, Rapid Dry, and Profile are the most common products we use to assist with wet infield conditions. These products should be used judiciously for two reasons: they are an expense to the program and they change the properties of the infield mix when used abundantly.
We keep bags of these field drying agents in the maintenance shed. Never use more than one bag per field. If you think you need more than one, then it is too wet to play.
Steps for Applying a Drying Agent
- First remove as much water as possible using the foam method.
- Use a spreader, shovel, or hand to evenly apply a thin layer of the drying agent.
- The material may be lightly incorporated using a rake or left on top of the infield mix.
Tarps
We have several tarps available for field #1 if rain is forecasted overnight and there are games slated for the next day. During the season we keep these tarps just outside the first base line gate.
Installation
Once the field is groomed for the night take one tarp and cover the home plate area then take a second tarp and cover the pitching circle. Make sure you use weighted items to secure the tarps in place.
Removal
When getting the field ready after it has been tarped you must remove and store the weighted items outside the field of play. Then roll the tarps up and return them to the outside of the fence along the first base line. Once the tarps are removed you will need to use a rake to loosen the infield mix in the covered areas because they will become packed under the weight of the tarps.
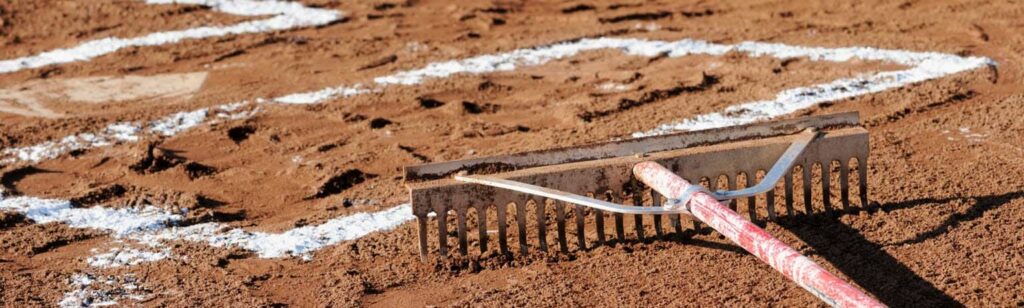
Infield Grooming
- Remove the bases and plug the base anchor sleeve before beginning any operations.
- The lawn tractor is located in the maintenance shed. You can use this to speed up the grooming process. The rakes are located in each of the press boxes. They are to remain in the press box once you have finished using them.
- Vary the dragging pattern every time the field is groomed.
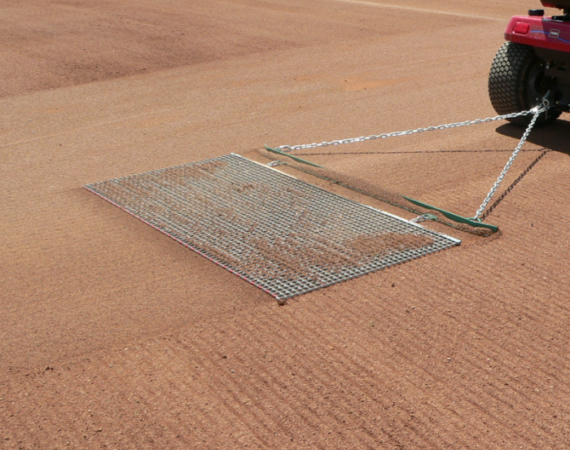
- If the field is moist or hardened, scarify the field with the nail drag drug behind the lawn tractor. Our nail drag is located in the maintenance shed and is constructed of white plastic with several posts on the bottom to scrape the infield mix.
- If the infield mix is already loose then finish groom the field with a drag mat or rake. You can use the tractor or you can pull it by hand. Go slowly!
- When finished dragging, stop 5 to 6 feet before the edge of the infield and lift the drag. Shake any excess field mix off before exiting the field.
- Try to shake the excess in a different location each time to prevent build-up of infield mix in one location.
- Hand rake out the pile left from the field drag.
- Hand rake: base paths end-to-end, home plate, and the back radius of the infield.
- DO NOT pull the nail drag or drag mat into the grass for any reason.
- DO NOT take a nail drag or drag mat within 24” of the grass edge. Only hand rake edges to prevent lips from forming.
- DO NOT take a nail drag or drag mat over home plate, the pitching rubbers, or base anchors. It will ruin these or damage the drags. These areas must be hand raked
Lining The Field
Only use “Athletic Field Marker” for foul lines and batter’s boxes on our fields.
Foul Lines
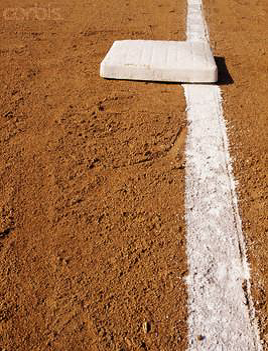
Always use a string as a guide line. We have a string line attached to a spike in each of the press boxes. Use these tools to mark the foul lines. Push the spike in just behind the point of home plate closest to the backstop. Run the string from the spike to the foul territory side of the foul pole. In other words, run the string to the right side of the right field foul pole and to the left of the left field foul pole. The foul territory side of first and third base should be just touching the string. Once the string has been straightened, apply the marking lime to the infield side of the string.
The foul line should run under the outside of the bases as shown below.
When using the chalk marker make sure that you set it to the first open notch for the 2″ line width.
Batters Boxes
- Each press box has a Softball Batters Box Template located in it.
- Make sure that the batters area is well raked and has good loose infield mix.
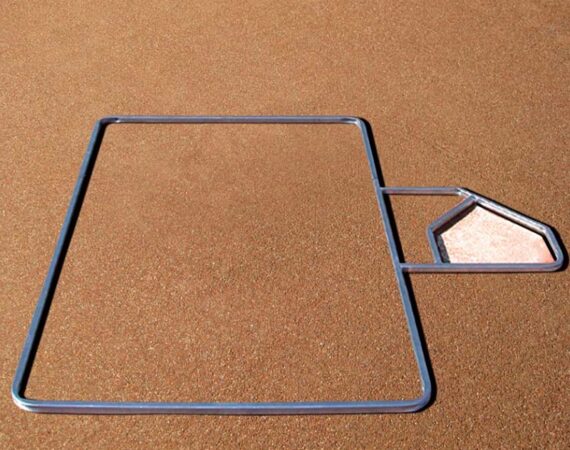
- Set the official home plate locator on home plate so that it matches the shape as pictured below.
- Stand on the home plate locator and then you want to use the pivoting movement of the template to have the box template press into the loose infield mix to make an indentation that we will use to mark the proper lines of the boxes.
- Carefully pivot the box template back up and then flip the home plate locator to the otherside of the plate. Then press it down on the other side of the plate to make the other batters box.
- Once you are done with the template you should have two well defined indents in the sand to allow you to chalk the boxes.
- If you make a mistake then you can rub out the mistake with a foot or brush and remark the lines.
Pitching Circle
The pitching circle needs to have a 4′ radius from the pitching rubber.
We have a circle tool to assist you with this.
- The circle marker is located in each press box. It consists of a spike attached by a blue rope to a broom handle.
- Simply push the spike into the clay just behind the center of the pitching rubber.
- Pull the rope taught using the broom handle. Make sure that there are no knots in the rope.
- While keeping the rope pulled tight, walk a circle around the pitching rubber while dragging the end of the broom handle in the dirt. This will leave an exact 8′ diameter circle that you can easily use to chalk your pitching circle.
Marking During Tournament Play
During tournament play there are several lines required that NELLS does not usually chalk. These include coaches boxes, batters circles, and first base runners lane. Below is a link to a diagram of all the lines and measurements needed for a proper tournament game.